The Making of "The Flood"
By: Loredana Papp
In this tutorial you will use some pretty simple Photoshop techniques to blend different images that normally don't match (like the dry soil cracks and the sea) into a beautiful and dramatic surreal composition. Let's get started!

Getting the stock-images
The most important thing in a landscape photo manipulation is the right stock, so pick them carefully! I've chosen the following stock:
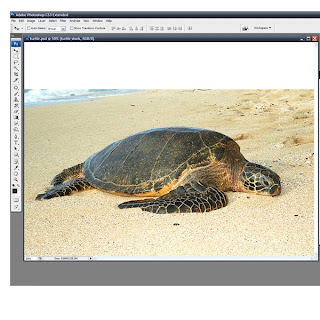
- Turtle from manaphoto-stock
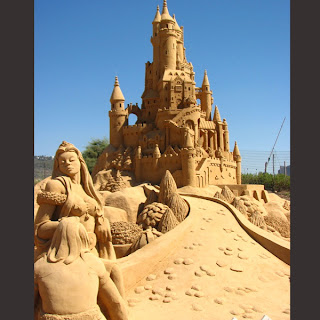
- Sand Castle 1 from misskayastock
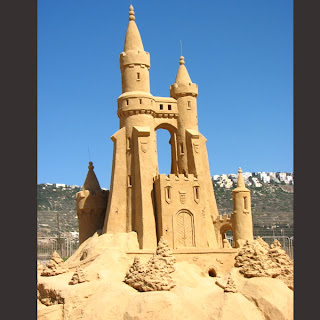
- Sand Castle 2 from misskayastock
- Sky 1 by ZaNuDa
- Sky 2 from personal resources
- Sky 3 from causticstock
- Sky 4 from flordelys-stock
- Sea from ephedrina-stock
- Sand Castle 3 from stock.xchng
- Desert from kjherstin-stock
Step 1
Create a new file and drag in the Turtle picture.
Step 2
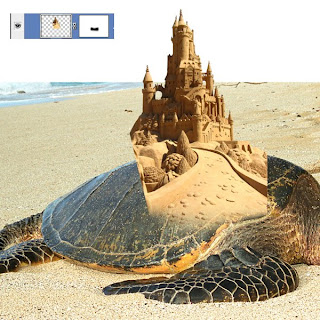
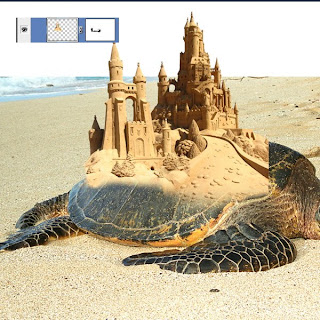
Open the Sand Castle 1 image and cut out the castle and the road. I used the Pen Tool. After you cut it out, drag it into the new file. Decrease the image size so it will fit on the turtle's back. Place it like in the image below. Create a mask and erase the bottom part with a basic brush (black color and soft edges).
Step 3
Open the Sand Castle 2 image. Cut it out as you did in Step 2. Decrease its size and place it on the turtle's back as shown.
Step 4
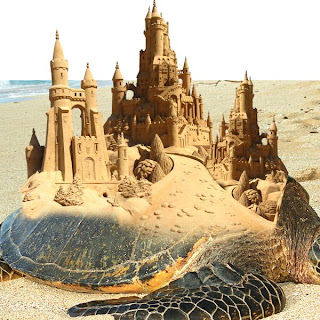
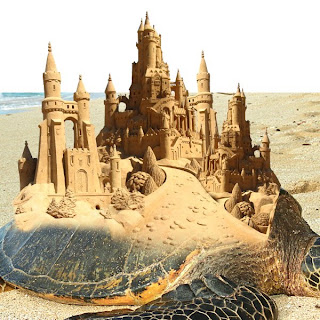
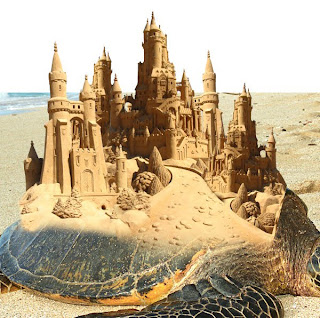
Next, we'll create a bigger castle. Duplicate the layers of the two castles that you have already cut out by pressing Command + J on the layer you want to duplicate. Decrease the images size by pressing Command + T. Now flip them horizontally so they won't look strange and place them as you think they should fit.
Step 5
Create a new layer. Use the Clone Stamp Tool to place some sand on the turtle's shell.
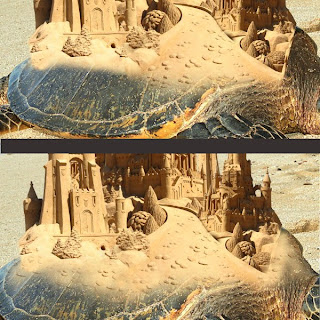
Step 6
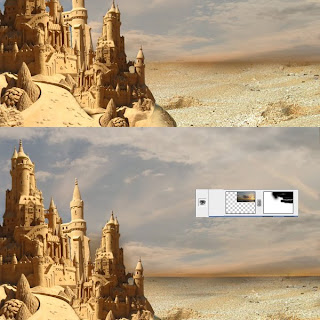
Now let's create the sky. I used four different pictures to create this sky because I want the result to be unique. You can't achieve that if you use a stock picture just the way you find it. Open the Sky 1 image and place it as shown. Create a mask and erase the bottom edges.
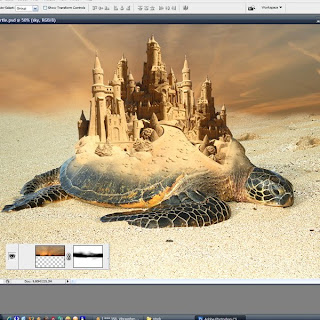
Step 7
Open the second sky image (located in the PSD source file). We only need the skyline from this picture so erase the other parts on the layer mask.
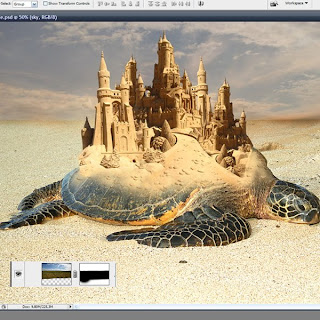
Step 8
Open the Sky 3 image, decrease its size and place it on the left side of the design. Create a mask and erase the parts that don't fit.
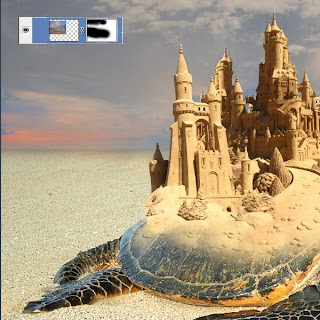
Step 9
Open the Sky 4 image and place it to the right. We only need the skyline from this one too so erase the rest with the mask.
Step 10
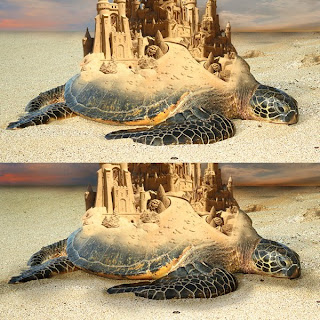
Create a new layer. Select a basic brush with smooth edges (black color) and start drawing some lines on the sand at the turtle's edges. Then go to Filter > Blur > Gaussian Blur (Radius 7px), and then set the layer Opacity to about 30-40%.
Step 11
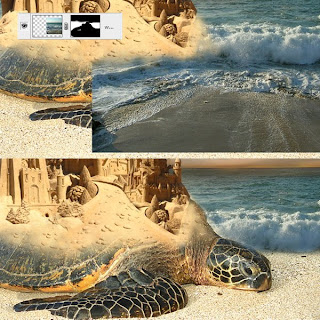
Open the Sea image. Drag it into the file and decrease its size. Duplicate the layer by pressing Command + J. Place the first layer at the right of the turtle and the second layer at the left. Create a mask for both layers and erase the parts that we don't need, as shown below.
Step 12
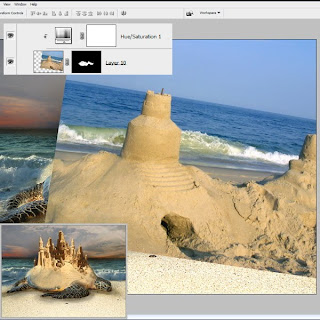
Open an image of Sand Castle 3, then drag it in and flip it horizontally (Edit > Transform > Flip Horizontally). Place it so the sand castle would be on top of the turtle's shell. Decrease the opacity of the photo so you will see where to place it.
Now that the image is placed correctly increase its opacity back to 100% and create a mask for this layer. Erase all the sand that is not on the shell. Now create a clipping mask by pressing Alt and going to the Adjustment Layers > Hue/Saturation, then set it as Hue: +5, Saturation:+20, and Lightness: +5.
Step 13
Now drag the Desert photo in and erase in the mask the parts on the turtle and the sea. Set the blending mode to Multiply.
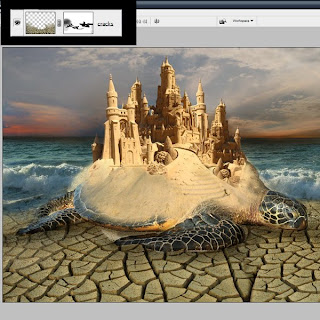
Step 14
Create two clipping masks. For the first clipping mask go to Adjustment Layers > Levels with the next input levels: 24 , 1,00 and 189. For the second clipping mask go to Adjustment Layers > Hue/Saturation, and set Hue at 0, Saturation at -41, and Lightness at 0.
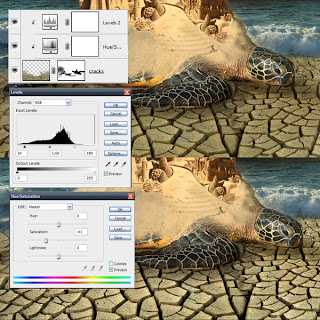
Step 15
Open the Sea picture. Place it at the back of the turtle, like you see below. Open the same picture again and place it to the left of the turtle. Create a layer mask and start erasing the parts we don't need as shown.
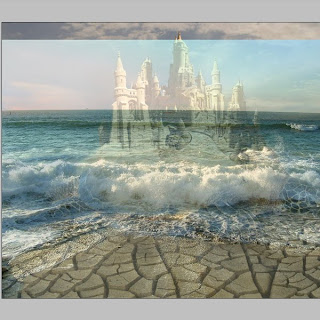
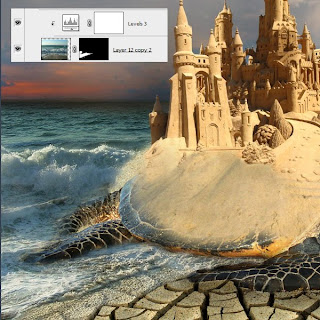
Step 16
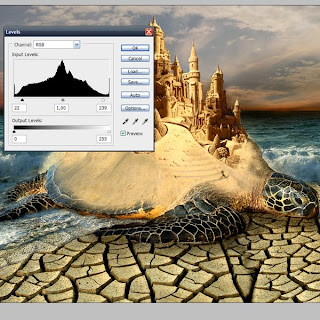
Now let's play a bit with the colors to create a dramatic atmosphere. Go to the Adjustment Layers > Levels with the next input levels: 22, 1,00 and 239.
Step 17
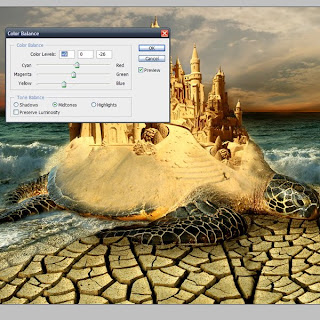
Go to Adjustment Layers > Color Balance, then set the color levels to: +9, 0, and -26.
Step 18
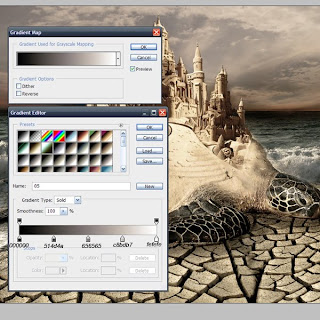
Go to Adjustment Layers > Gradient map, and follow the settings below. Also, set the Opacity to 60%.
Step 19
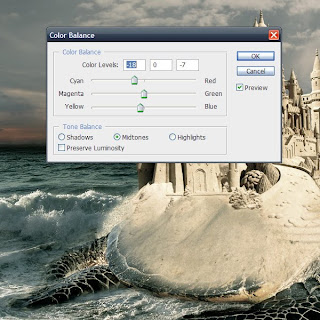
Go to Adjustment Layers > Color Balance. Set the color levels to: -18, 0, and -7.
Step 20
Go to Adjustment Layers > Photo Filter. Set the the Density to 50%.
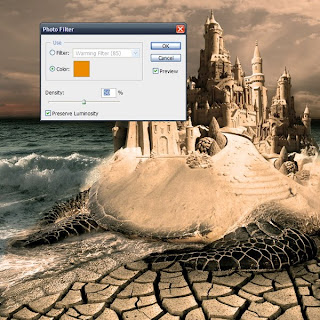
Step 21
Create a new layer, then use a basic brush with smooth edges to paint the turtle's eye. This is a minor fix but it makes it look better.
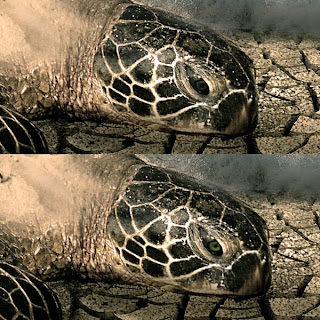
Step 22
Go to Adjustment Layers > Hue/Saturation, and use the following settings: Hue of 0, Saturation of +100, and Lightness of 0. Set the Opacity to 26%. Apply this on the turtle's right sides where the light comes from. Do it just like you see in the image of the layer's mask.
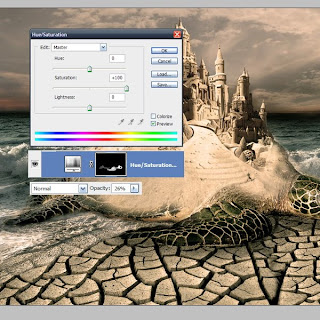
Step 23
Go to Adjustment Layers > Curves and use the settings below.
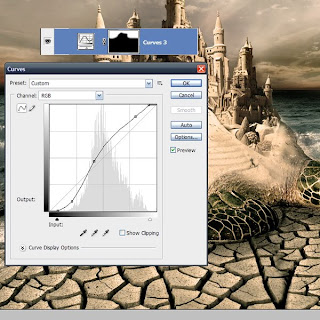
Step 24
Go to Adjustment Layers > Gradient Map. Use the settings shown below. Then set the Opacity to 50%.
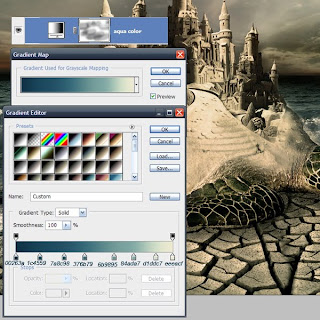
Step 25
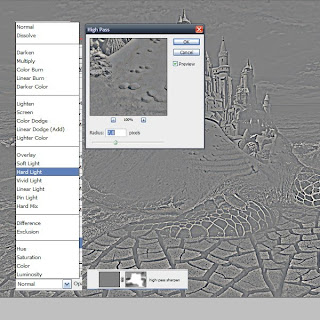
Next go to Filters > Other > High Pass. Set the radius to 7, 0. Set the blending mode to Hard Light. Erase the edges on the layer mask so only the middle of the image stays sharp.
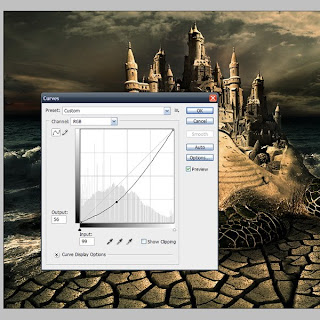
Step 26
Go to Adjustment Layers > Curves. Use the settings shown below: Output is 56 and Input is 99.
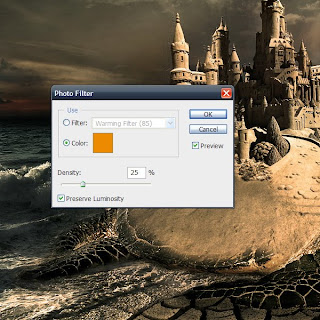
Step 27
Now this is the last filter we are applying. Go to Adjustment Layers > Photo Filter. Set the the Density to 25% so the atmosphere will look warmer.
Step 28
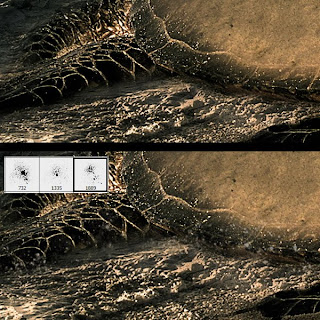
Apply some splashes where the water hits the turtle. Do it with a customized brush.
Conclusion
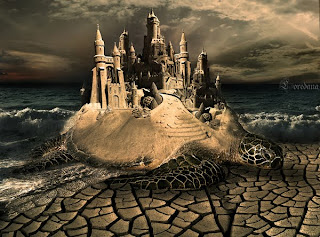
Sit back and take a look at your finished surreal photo manipulation!

Thursday, November 19, 2009 | 2 Comments


