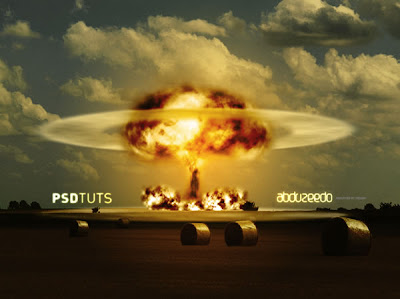
Create an Atomic Explosion in Photoshop
This is one of the PSDtuts PLUS tutorials and all the design return to the PSDtuts site
Creating explosions and fire in Photoshop is always tricky, and an atomic explosion is a big challenge. It was for me, but after some experiments, I figured out a nice way to achieve this effect. So in this tutorial I will show you how to create that.
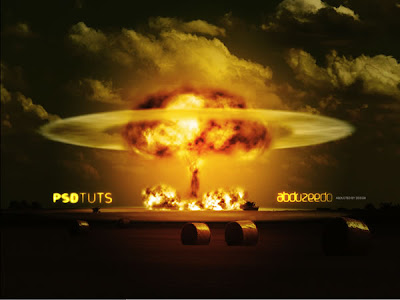
You can find the Photoshop PSD files in a directory labeled 'PSD' that came in the ZIP file that you downloaded. You may wish to look through them briefly before we beginFinal Designs
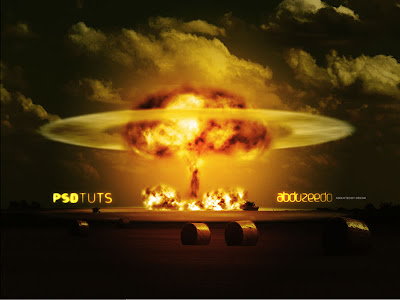
Step 1
Open a new document. I’m using 800px by 600px canvas size for this tutorial, but you can use a bigger size. Then place the image you want to use for the background. The one I chose is from http://www.sxc.hu/photo/838611.
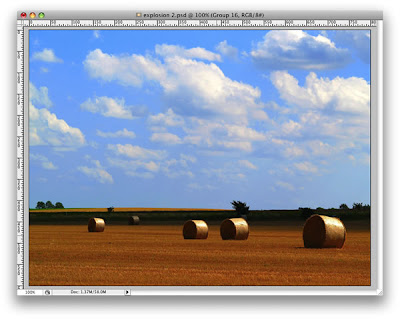
Step 2
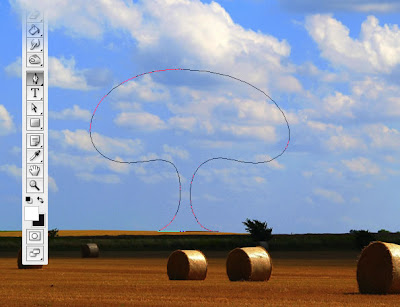
Create a new layer and rename it to "First Smoke." Then select the Path Tool (P), and create a mushroom shape similar to the image below.
Step 3
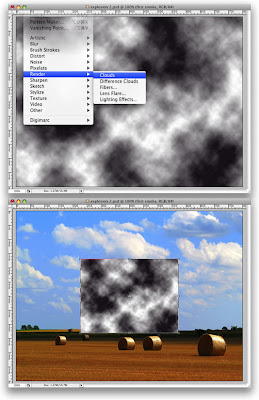
Create a new layer. Make sure that the Foreground is white, and the Background is black. Then go to Filter>Render>Clouds, but hold the ALT key of the keyboard in order to make the effect stronger.
The whole layer will be rendered with clouds. Now we need to resize it. Go ahead and make it smaller, as in the image below. We do this so there is more detail in our explosion.
Step 4
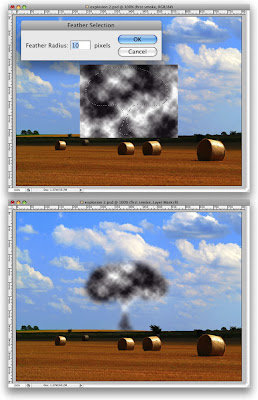
Go to the Paths Palette, select the mushroom path, and click on the Load Path as Selection button. Then go to Select>Modify>Feather, and use 10px for the radius.
After that, mask our clouds by going to Layer>Layer Mask>Reveal Selection.
Step 5
Create a new Folder in the Layer Palette. Rename it to "Little Smokes." Then create a layer in this folder. We will create 3 different smoke shapes for the base of the mushroom.
Repeat Step 3 to create the clouds. Then with the Lasso Tool (L), create a marquee selection, as in the image below. Then repeat Step 4; only this time use 2px for the Feather Radius.
After that, repeat this step two more times, but with different layers.

Step 6
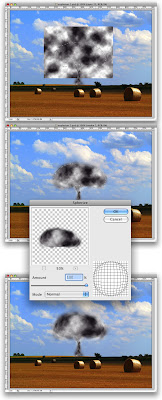
Again, lets create another layer, and name it "Smoke 2." This time, place it in front off all the other layers. Let's repeat Steps 3 and 4 again, but don't create a different selection, just create the top of the mushroom.
After you've masked the area, create a marquee selection. Click with the right button of the mouse on the mask thumbnail. Then choose Select Pixels. We need this marquee to apply the filter, so go to Filter>Distort>Spherize.
Step 7
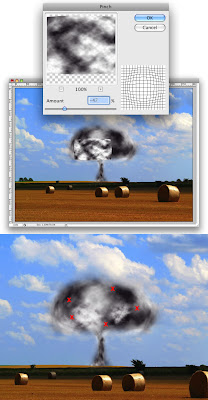
Now lets create some details for the mushroom smoke. Create a new folder in front of the other layers, and rename it to "Smoke Details." Inside this folder, add a new layer, and again repeat Step 3. After that, go to Filter>Distort>Pinch. Then with the Eraser Tool (E), select a basic brush with 0% hardness and 20px radius. Now just delete the edges of the layer to make it uniform.
Repeat this step two more times to create more details.
Step 8
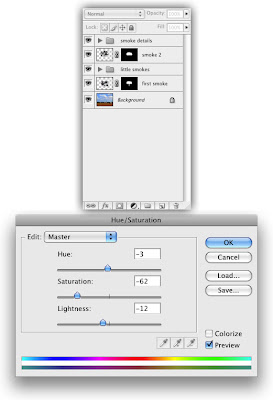
Change the Blend Mode of the "First Smoke" and "Smoke 2" layers to Hard light, and use the same blend mode as the 2 folders we’ve created as well.
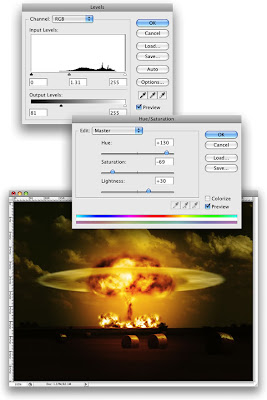
Select the background image. Then go to Layer>New Adjustment Layer>Hue and Saturation, use the values below.
Step 9
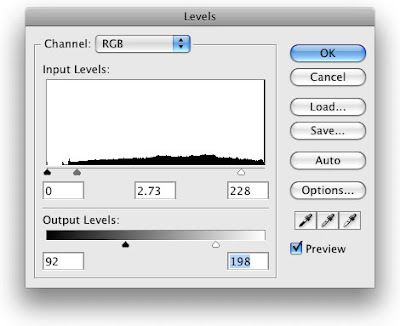
Select the “First Smoke” layer. Then go to Layer>New Adjustment Layer>Levels. Use the values below.
Step 10
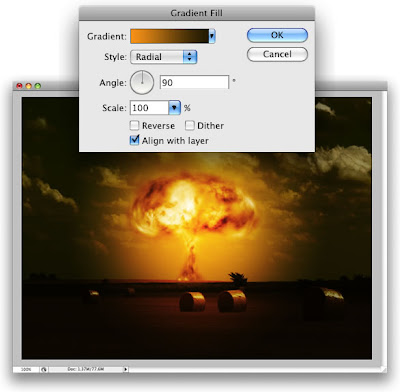
Go to Layer>New Fill Layer>Gradient, use (#ffa200) and (#2f2200) for the colors, and set the Style as Radial. Change the Blend Mode to Overlay. After that, duplicate this layer to make it stronger ;)
Step 11
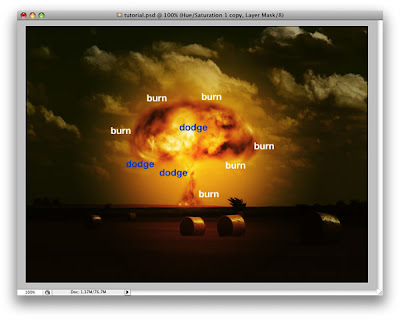
Now we add the final details. As we are using the Clouds filter, you probably don’t have the same smoke as mine. So it's important to understand the concepts of what needs to be done at this stage. If necessary, make some areas darker, or brighter. To do that use the Dodge Tool and the Burn Tool in the layers you want to change. See the example below.
Step 12
Now lets create the smokes on the ground. Again, lets repeat Step 3, but make the smoke layer very small, as in the image below. You will have to repeat this step 2 or 3 times because we want a wide block of smoke.
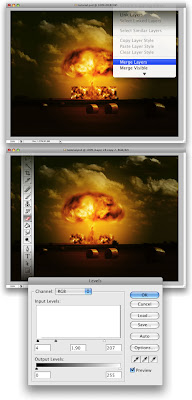
After that select the 3 layers you have just created. Then go to Layer>Merge Layers. Next select the Eraser tool, with a brush set to 0% hardness, and a small size set as 10px Radius. Use it to start deleting the layer until you get a nice explosion shape, as in the image below.
Lastly, go to Image>Adjustments>Levels. Then move the sliders in order to get more highlights and add more white to the fire.
Step 13
Repeat Step 12, only use the eraser to create a different shape. This time change the blend mode to Color Dodge, and skip the Levels adjustments.
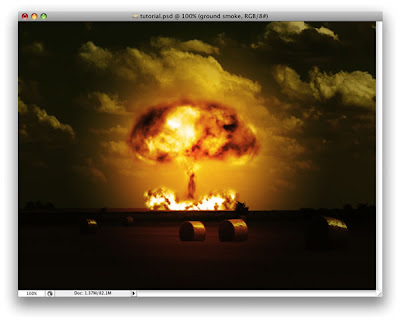
Step 14
Repeat Step 12 again, but delete different parts, and make the clouds even smaller. The secrets here are we will add a Layer Style of Color Overlay with the color set as Black, and the Blend Mode set to Soft Light.
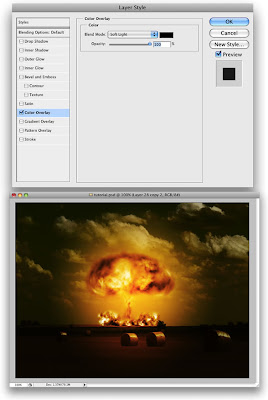
Step 15
Just one more time, let's repeat Step 12. This time change this layer’s Blend Mode to Hard Light.
You can repeat Step 12 more times, if you want to make your fire even more detailed and realistic. The idea is have multiple layers. There should be a base fire layer. A layer with highlights. Then in front of that a darker one should be placed. And yet another one should be placed in front of the darker layer that has more highlights. This gives depth to the explosion.
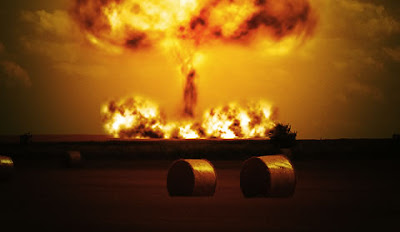
Step 16
Lets create those waves of air that the explosion produces. To do that select the Ellipse Marquee Tool, use 20px Feather. Create a circle selection and fill it with a white. After that, create another circle, which is smaller. Give it a 5px feather, and place it in the center of the bigger circle. Then just delete that area from the bigger circle, as shown below.
After that, click with the right button of the mouse on this layer in the Layers Palette. Then choose Select Pixels. Then go to Filter>Render>Clouds.

Step 17
Go to Edit>Transform>Distort, and distort the image until you get a nice perspective, as in the image below.
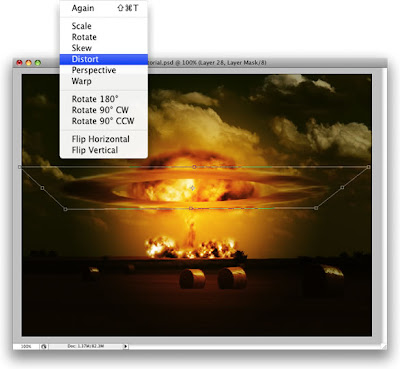
Step 18
Now go to Image>Adjustments>Levels, and then go to Image>Adjustments>Hue and Saturation. The idea is to add more white to this layer. Make it looks more like a cloud instead of fire.
Step 19
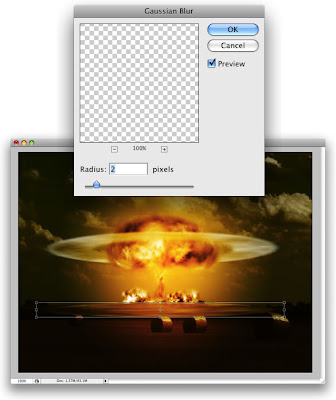
Duplicate the layer. Then move it to the base of the mushroom. Then add some blur by going to Filter>Blur>Gaussian Blur. After that, change the Blend Mode to Screen, and resize it.
Step 20
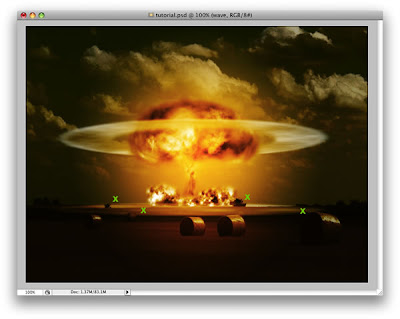
With the Eraser tool you can delete some areas of this layer, like some parts of the trees. This will make this air wave more realistic.
Conclusion
The first time I tried to do this effect I took some time trying different methods, but after doing that 3 times I was able to simplify the process. So now it’s basically repeating the same Filters and tools several times. Duplicating the layers won't give the same effect, that's why we repeat the steps many times.
You can even mask the gradient fill, and add different adjustments to the image, to get different colors and styles. However, the best thing in this tutorial is that you will be able to create amazing fires and atomic explosions now.


9 April 2009 at 19:08
Thank you! Your blog post will be advertised on the DigiFree Digital Scrapbooking Freebie search engine today (look for timestamp: 09 Apr [LA 07:00pm, NY 09:00pm] - 10 Apr [UK 02:00am, OZ 12:00pm] ).
Post a Comment