Colouring human FaCe


وكي نرى مكان العين من خلال اللير المملؤ باللون البيج نخفف شفافية اللير البيج ونكبر الصوره ونمسح عند

نضيف لير جديد..ونلونه بلون بيج مائل إلى الزهر بعد التكبير كي نكون دقيقين ولا يخرج اللون خارج حدود الوجه والكتف
لكن الدقة هنا ليست مطلوبة تماما لإنها ليست بذات تأثير كبير فالفلتر القادم سيحل اي مشكلة لخروج اللون خارج حدود الحدود
كود اللونDCBB9C

7- إذا أرضتنا نتيجة البشرة..نتوقف..أما إذا لم تظهر بالصورة المطلوبة
فبإمكاننا ان نضيف عليها درجة جديدة بلون افتح قليلا او كما نرغب
ولذا أضفت لير جديد للبشره وإخترت لون أفتح لإن اللون السابق لم يرق لي كفاية
DAC5B4

بهذا نكون إنتهينا من تلوين البشرة فقط
8- نبدأ الآن بتلوين العينان
اختار اللون الذي أريده للعين..وبالفرشه الونها... في الصورة التي طُبِق عليها الدرس لا تبدو العين واضحة كثيرا
انا اخترت لون أخضر

soft light
بالطبع كل خطوه بلير جديد
وهذه الخطوه لن تبدوا واضحة جدا لان العين غير واضحة التفاصيل..

اطبق فلتر بلر..واغير المود لــ
hard light
واذا أحببت أن أضيف كحل بلون اسود واطبق نفس الخطوات ستكون النتيجه جميلة جداً
10- نبدا بتلوين الشفتان..نضيف لير ونلونهم بالفرشه باللون الاسود..كي نضفي عليهم غمق بالبداية

وننقص الشفافيه الى 45 ونغير المود إلى
soft light
11-والآن اضيف لير جديد والون الشفتان مره أخرى.. لكن باللون الذي أريده أن يظهر
انا إخترت موف
B873A9
soft light

12-والحاجب بالمثل نحدده بالبني وبلر القيمه 1 والمود نفسه
وللخدود بالفرشه نرسم بهذا اللون
B0611C

ونعمللها بلر ولكن بقيمة 17 هذه المره..كي ينتشر اللون جيداً
والمود
soft light

الآن نأتي للخطوة الأخيرة...والتي تضفي تاثير جميل على الالوان..وتجعل الصورة مضيئة
ندمج جميع الطبقات باي طريقه..والاوضح من flatten image <<<<< layer
نضاعف اللير بالضغط بالزر اليمين على اللير واختيار
duplicate layer
على اللير المضاعف نغير المود الى
screen
وهذه النتيجة

Saturday, November 29, 2008 | 0 Comments
aboTREKA 3dText

Let's start:
Step1: first open new project Ctrl+N and chose ur image size for me 800*600 pxs are good
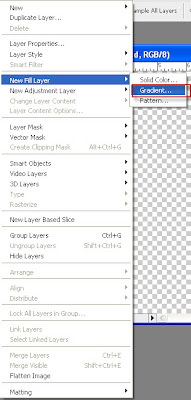
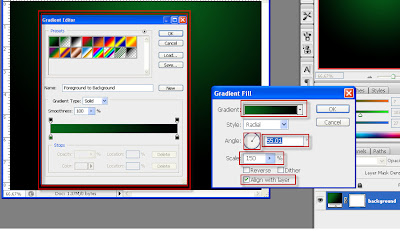
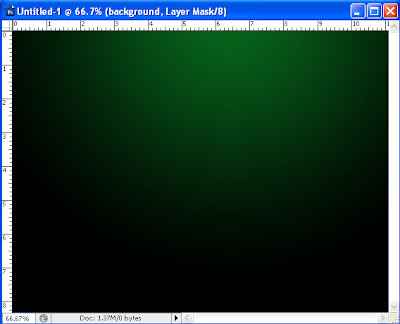
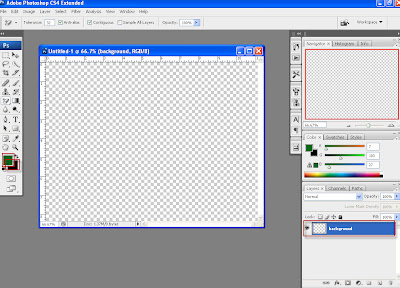 Step2: Then go to Layer > New Fill Layer > Gradient and then select the parameters u prefer U can use the image below as reference and you can move the gradient to the side of the pic...
 Step3: In adobe Illustrator and this program is greet u can do such greet effect and create ur own vectors by it ((Down load illustrator HeRe))
First select Text Tool(T) and make ur space for the text u want (just like the image below) then type the letter as 2
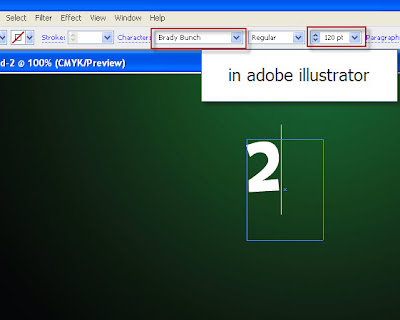 THEN by this tool which u can find in tool bar select it and go to the letter and press on it
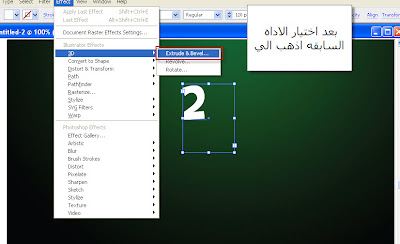
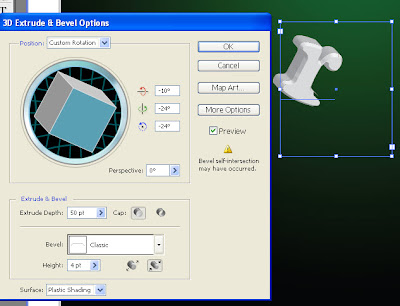
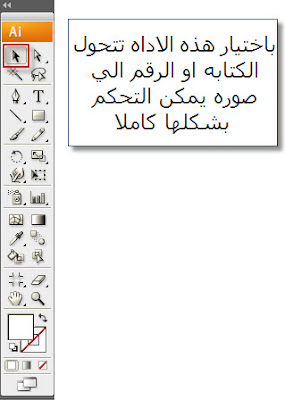 SO that the letter converted from text feature to shape as shown in the image below and then go to Effect > 3D > Extrude&Bevel
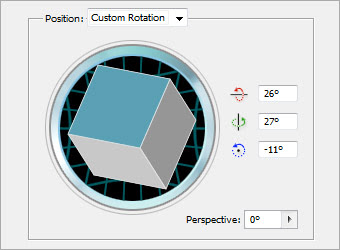
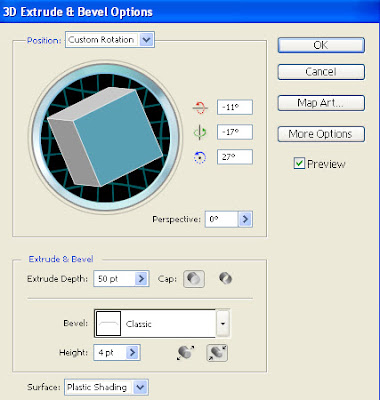
  Step4: you can use the image below as reference to adjust ur parameters
NOTE:from this options you can control the 3d effect of the letter
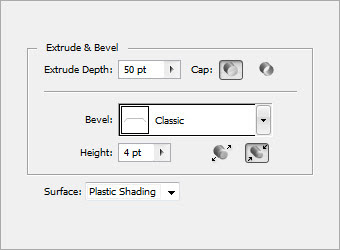 Step5: use Drag and Drop method to bring ur work from adobe Illustrator to Photoshop
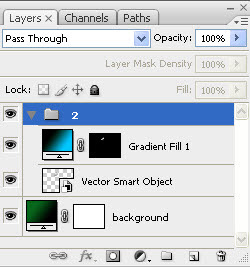
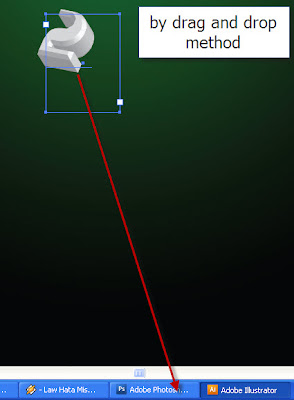 As you see in Layer pelette the Illustrator work appear as Vector Smart Object
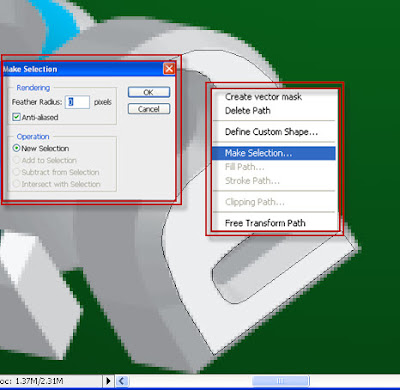
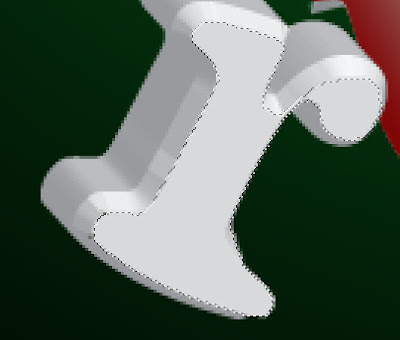
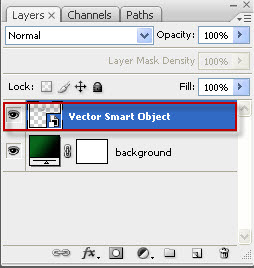 Step6: make anew layer above the vector smart object then select Pen Tool(P) and make ur selection as shown in the image below then right click on the selection and chose Make selection and adjust the Feather to (o) px
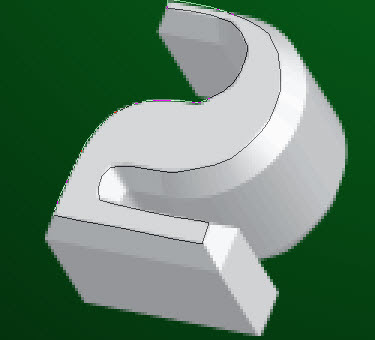
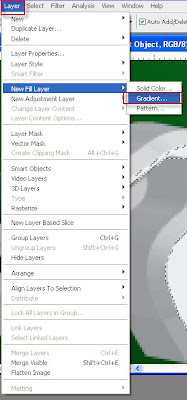
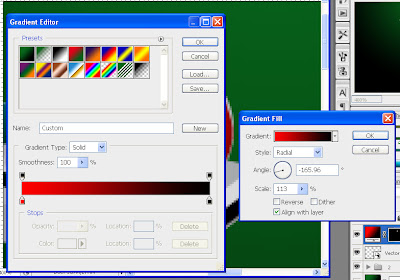
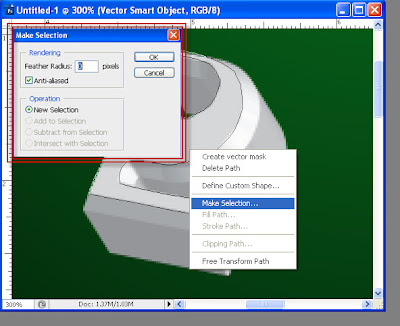 Step7: on the selected area go to Layer > New Fill Layer > Gradient and adjust ur parameters ..you can use the image below as reference
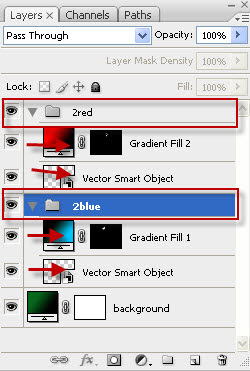
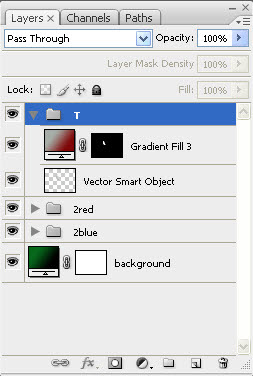
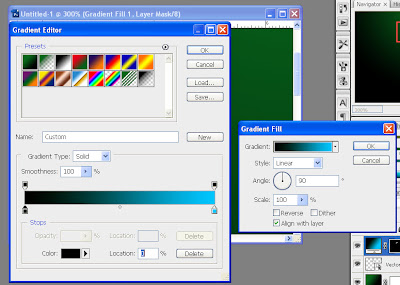 AS you see here the Layer pelette ....u can group each vector smart object and its gradient layer in one group
  Step8: Then repeat the from step3 as you first return to Illustrator and type ur letter or no. then select the tool to convert the text to shape and go to Effect > 3D > Extrude&Bevel and set ur parameters to control the 3d effect of ur letter
 Again by Drag and Drop method to bring the Illustrator work to photoshop and make ur selection and so on ...........
 Here u make ur gradient colour for the selected part of ur letter
 AS you see the two vector layer and each have its gradient color and grouped
 Repeat from Step3>>>to>>>Step7

 Finally you can get this results
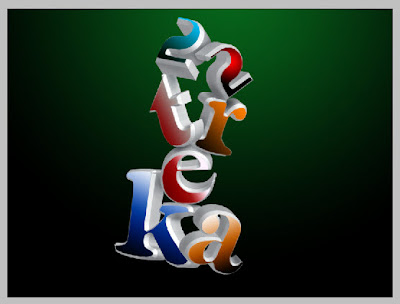 Final Image: you can reavh this final result by using some effect and brushes
u can download these brushes from HERE

Monday, November 24, 2008 | 0 Comments


