Fantastic Sun
Posted by
moih60
Labels:
fantastic sun
من خلال هذه الدرس يمكنك عمل خلفيه رائعه وذلك خلال 10 خطوات
Final Image

Let's Start>>
Step1: make new work place as 800*600 pixels and fill it with yellow colour >>with any degree of yellow
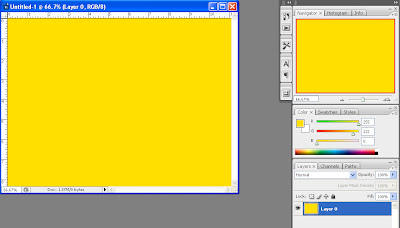
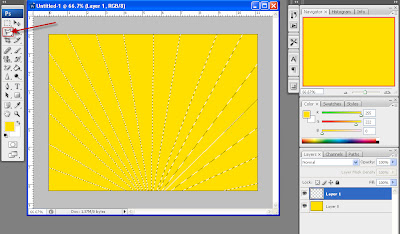
Step2: with Polygonal lasso tool(L) you can make aselection like this in the image below then make anew layer name it "sunrays"and with slightly brown colour fill the selection with it
as the image below as it appear as sunrays
NOTE>>use Paint bucket tool(G) to fill this selection
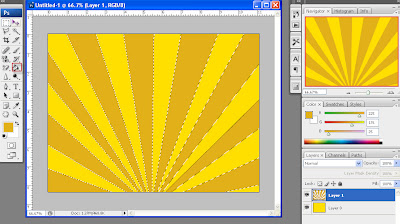
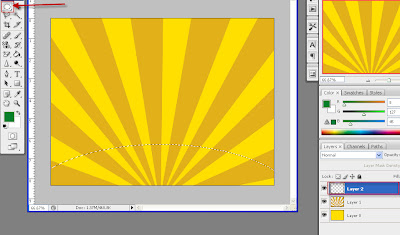
Step3: make new layer name it "Ground" make selection with Elliptical marquee tool(M) as this in the image below then with Paint bucket tool(G) fill the selection with vry dark green colour as in the image below
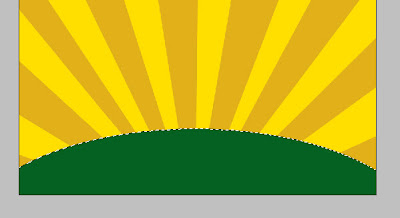
Step4: Make The Grass
making tha grass you have two choice you can use the Brush tool(B) or another way as i use
First>>>on the Ground layer select Smudge tool(R) and adjust it as Diamater 4 px and Hardness 0 % then make some outgrowth from the ground which look like as grass as the image below
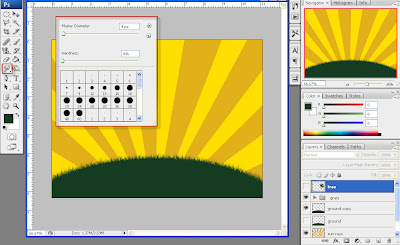
Step5: Tree
make new layer name it "Tree"and then download this brush
And use the Brush tool(B) and press F5 to view the brushes and make load for this brush and use it to make such very dark green tree as in the image below
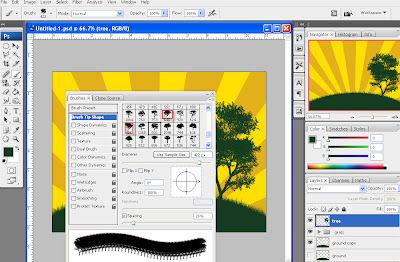
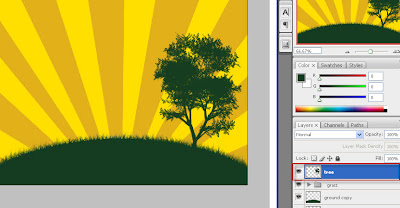
Step6: make anew layer name it "Rainbow" and have Pen tool (P) adjust the setting as in the image below
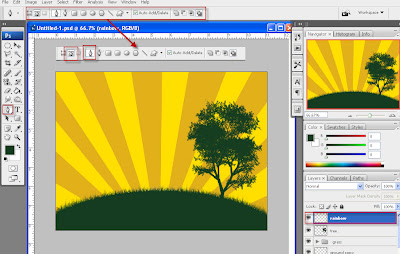
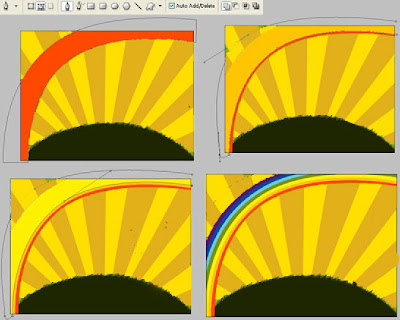
then make selection that look like one ray as in the first image and fill it with one colour >>Repeat the same thing as you will use the same selection but make anew layer and fill the selection with another colour and etc til u have seven layer (((rainbow layer and another six colour layer )))each of these seven layer have different colour
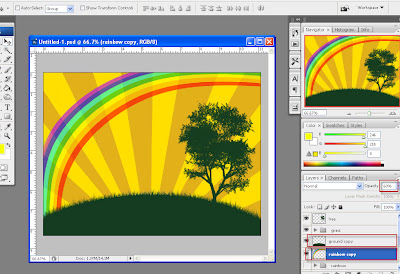
Adjust them one behind the other til u have the final result as the image below
Selact all these seven layer and press Ctrl+G as they will grouped in one folder name it "Rainbow" and reduce the Opacity to 60%
 Step7: make Birds
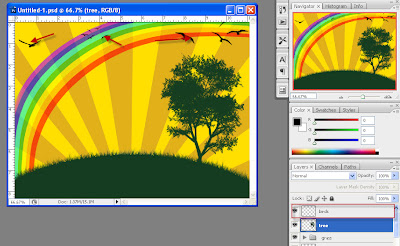
using the same procedures to make the tree you can make good view for ur image
AS download the bird Brush and prss F5 and B and load the brush and make ur image
Step8: Retro shapes
ALSO by the same way download this retro Brush and use it to make such shapes as in the image below
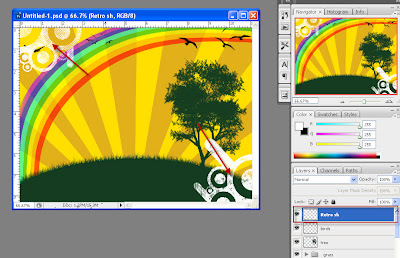
Step9: make Stars
ALSO use stars Brush to make ur image has agood view
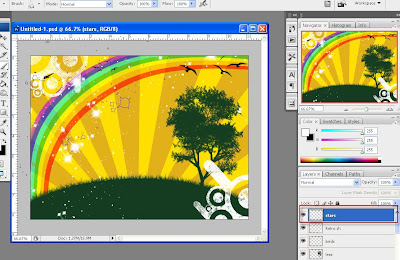
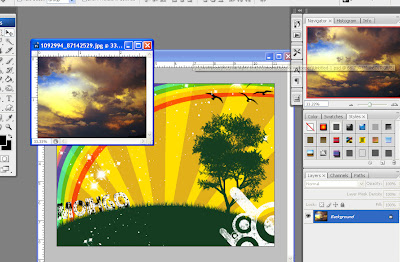
Step10: use another clouds image to make good background to the image
i use one you can get it http://www.sxc.hu/browse.phtml?f=download&id=1092994
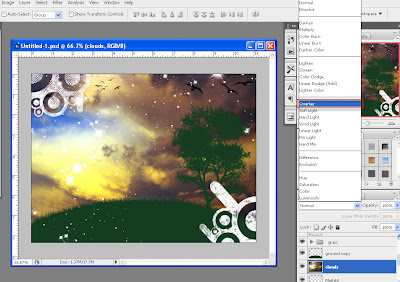
first reduce it size to fit with your image and then place it above the Sunrays layer and below Ground layer and finally change its blending option to Overlay
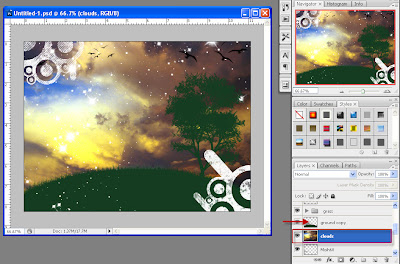
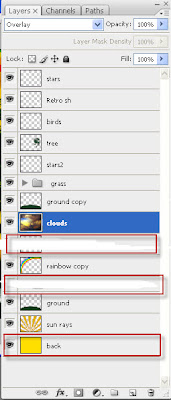
AND hare the full layer sets u can use it as reference
Final Image

Subscribe to:
Post Comments (Atom)


23 November 2008 at 07:10
very beauty design
excellent tutorial
thanks so much
Post a Comment