Nice Flower
Posted by
moih60
Labels:
Nice Flower
من خلال هذا الدرس يمكنك صنع ورده من خلال 12 خطوه
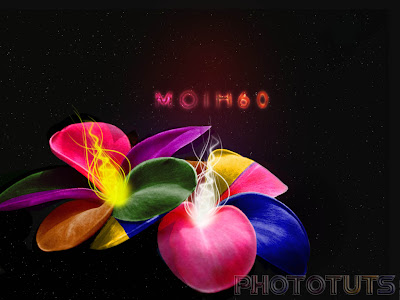
Final Image:
Let's Start: First the images below u can use it >>For me i use the first one
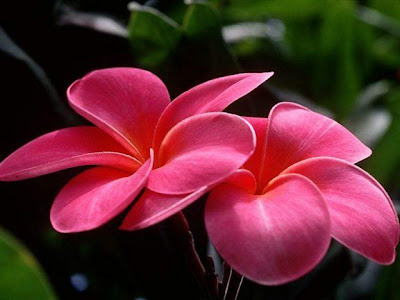
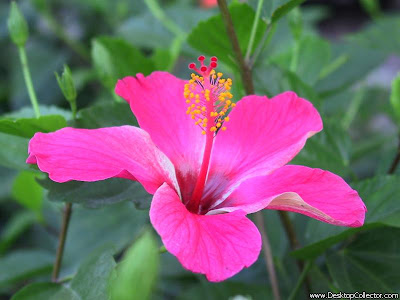
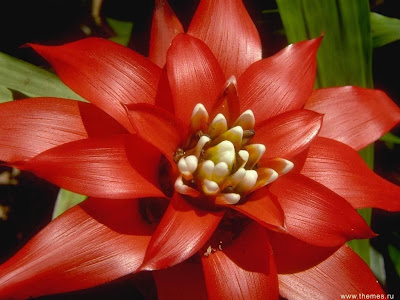
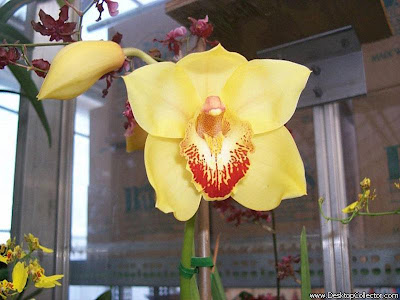
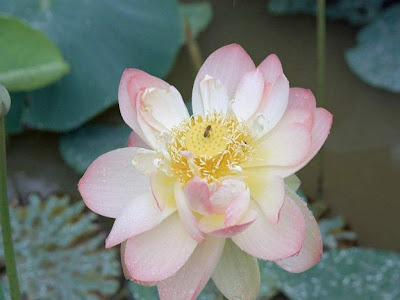
Step1: First use the Pen Tool(P) and make selection for the flower and separate it in new layer
 AS shown in the image below the layer with its background and another layer for the body of the flower
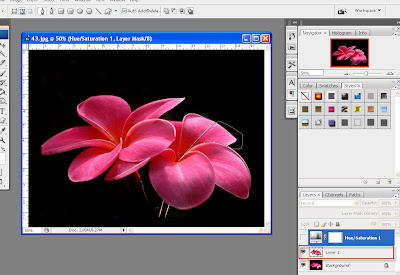
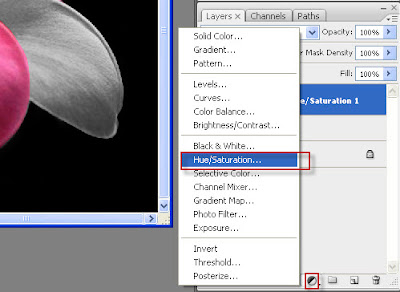
Step2: On the Layer palette click the part marked in the image below and then select Hue/Saturation and insert the parameters as shown in the image below
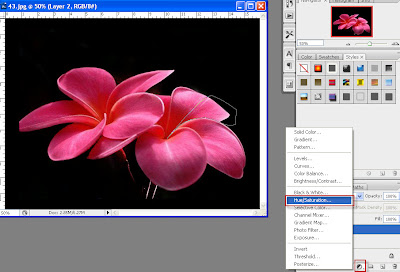
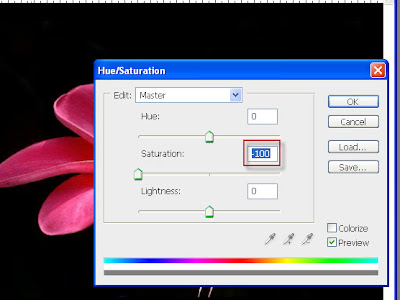
AS u see the image converted to black/white colour
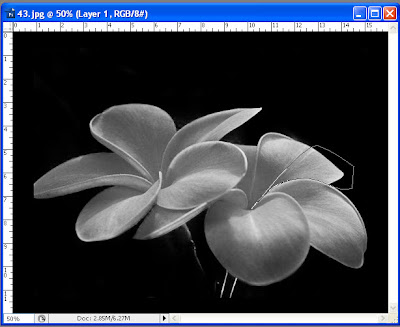
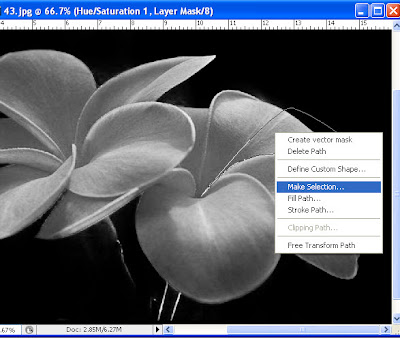
Step3: make selection using PEN Tool(P) for the part shown in the image below as half of the flower petals then right click and Make Selection and chose 0 pxs as feather radius as shown in the third image

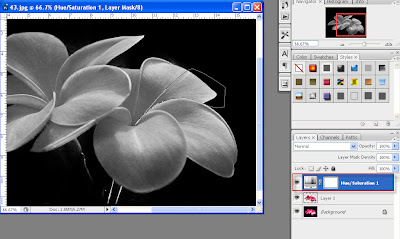
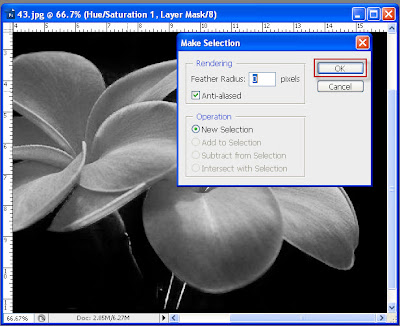
Step4: after making ur selection >>chose the mask as in image below and then>>select the Brush Tool(B) and with suitable smooth round brush and select Black colour for the foreground and make the flower petals colour
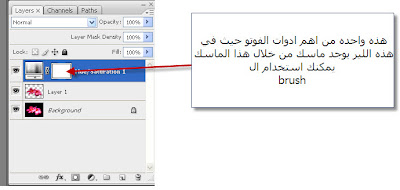 HERE >>i will explain how to use the mask features
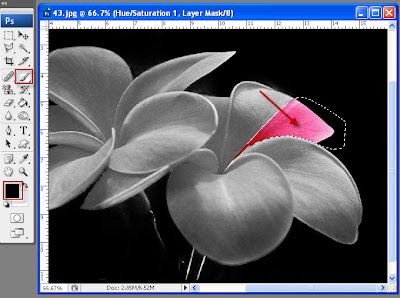
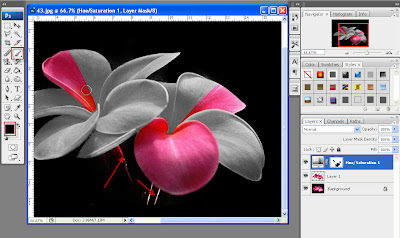
First:::: select Brush tool and Black as foreground and fill the selectrd area with the brush will colourize the selected part as shown in the image below
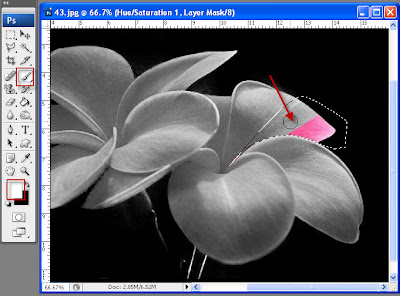
 Second:::: select the Brush tool and White for foreground and fill the selectrd area with the brush will decolourize the selected area as shown in the image below
SO: u can use this technique if u make some thing wrong u can repair it
 Step5: By the same way select another part of the flower as shown in the image below and make the same steps for giving the colour (the original colour og the flower)
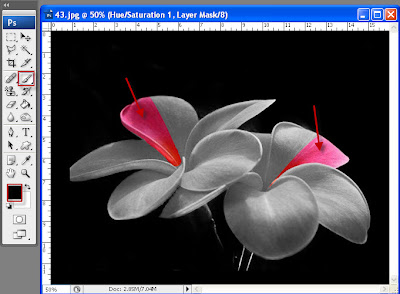
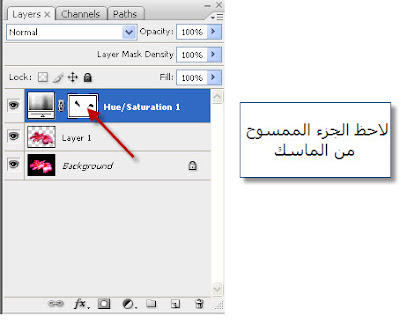 Step6: as shown in the image below again using Pen Tool(P) and right click then >>Make Selection and chose 0 pxs as Feather Radius
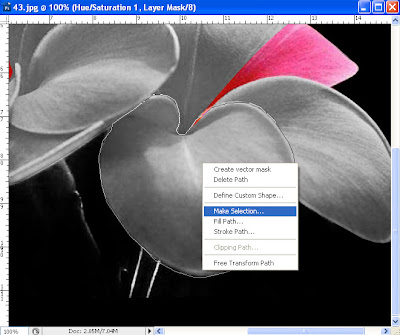 And on the mask >select Brush Tool(B) and set Black for foreground and fill the selection with the brush as it will converted to acolourized area (the original colour of the flower)
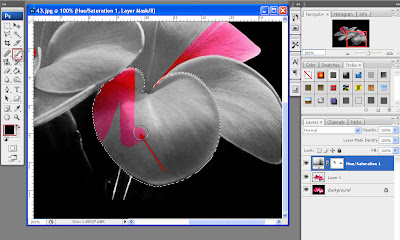 U can also use the same way to colourize the stem of the flower
 Step7: Finally >> make the selection on the above layer on Layer Palette and as previous make Hue/Saturation as explained last time
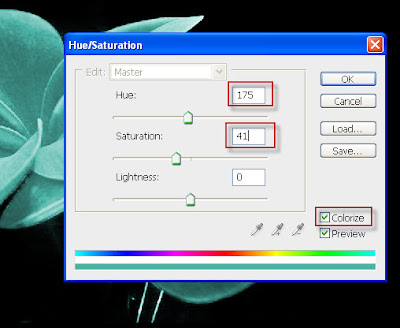
 And make the parameters as shown in the image below and make Colorize active
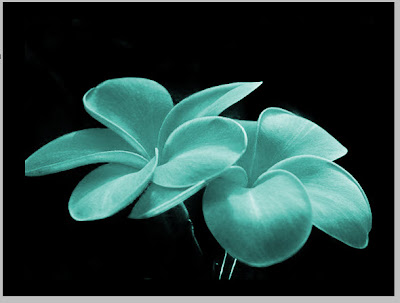 Then PRESS Ctrl+I so that the mask is converted and the original pic. appear again
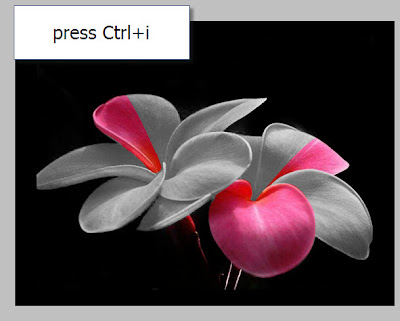 Step8: Here we make another mask but the mask here Hide All (if u can't understand this part plz send me ) as here to colorize the selected part u have to chose Pen Tool(P) and make ur selection for one or more petals as shown in image below and then >>select Brush Tool(B) and set White as foreground colour and fill the selected area with the brush so the selected part will colourized ((as the first mask was Reavel All and to colourize we chose black not white))
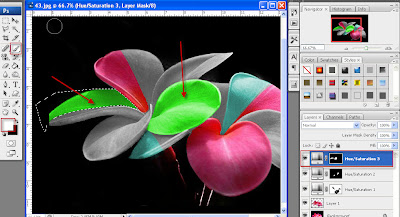 Step9: Again the same steps as on standing on the above layer and select Hue/Saturation and set ur parameters (NOTE:ur parameters in this window will guide u to chose ur colour) so u can use ur parameters and chose ur colour
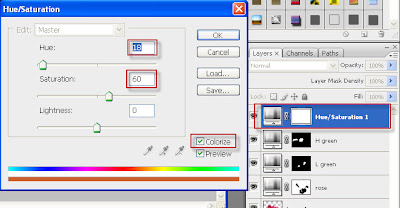 Then PRESS Ctrl+I so again the image return to the ORG pic. Then>>select Pen Tool(P) and make ur selection for one or more petals as shown in image below and then >>select Brush Tool(B) and set White as foreground colour and fill the selected area with the brush so the selected part will colourized
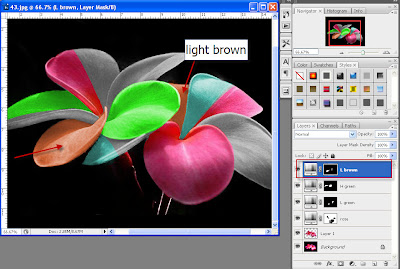 Step10: Again the same steps as on standing on the above layer and select Hue/Saturation and set ur parameters
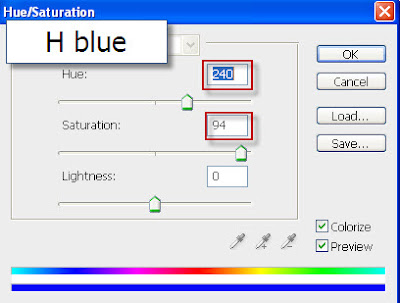 Then PRESS Ctrl+I so again the image return to the ORG pic. Then>>select Pen Tool(P) and make ur selection for one or more petals as shown in image below and then >>select Brush Tool(B) and set White as foreground colour and fill the selected area with the brush so the selected part will colourized
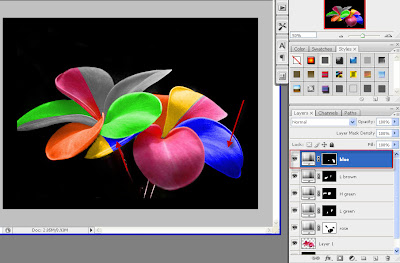 Step11: Again the same steps as on standing on the above layer and select Hue/Saturation and set ur parameters
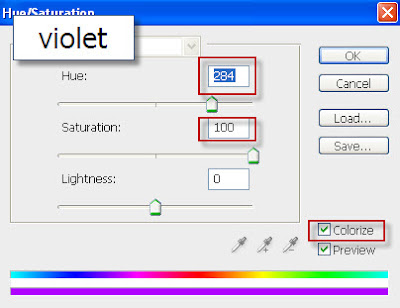 Then PRESS Ctrl+I so again the image return to the ORG pic. Then>>select Pen Tool(P) and make ur selection for one or more petals as shown in image below and then >>select Brush Tool(B) and set White as foreground colour and fill the selected area with the brush so the selected part will colourized
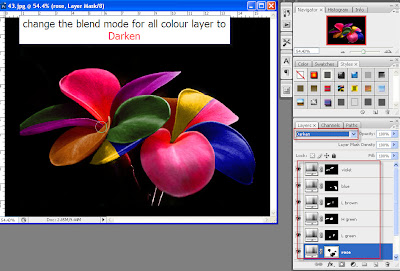
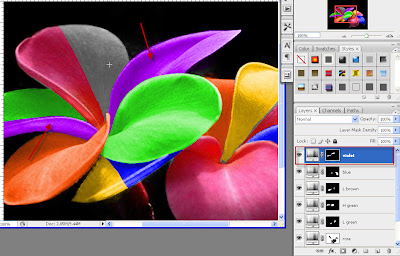 Step12: the most important part in this tutorial to give some reality to ur Design change the Blend Mode for all layer that contain Mask to Darken
Final Image: use some the GLOW Brush to give nice look to ur image

Subscribe to:
Post Comments (Atom)


Post a Comment